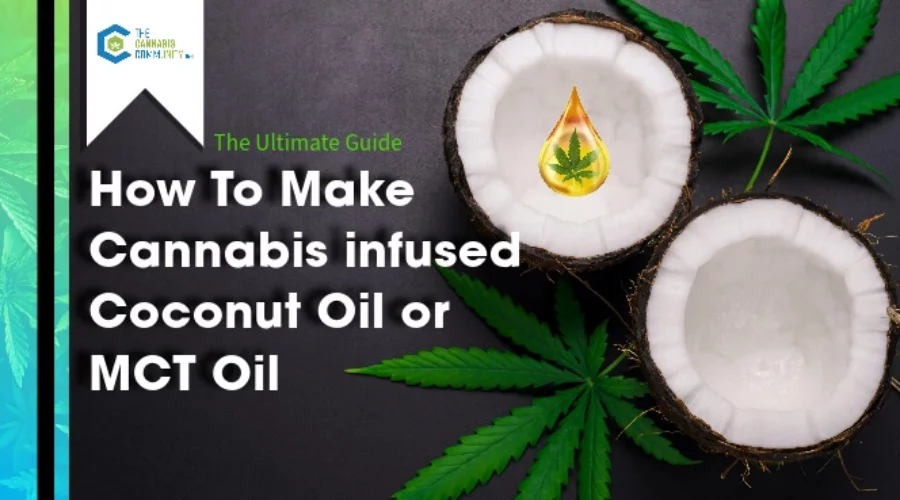
How to Make Cannabis-Infused Coconut Oil or MCT Oil: Crockpot Recipes
Table of Contents
Mastering the Art of Cannabis Oil Infusion: Tips, Tricks, and Recipe
Embarking on my first adventure with cannabis-infused coconut oil was a revelation. It’s been many years since my first kitchen infusion.
Blessed with generous backyard growers and their donated trim, this golden elixir opened doors to countless homemade remedies for me.
With time, my methods have polished and I promise, after a batch or two, you’ll find your groove.
So, pop on that ganja apron, let’s embrace the delightful mess, and above all, let’s infuse some fun!
Benefits of Making Cannabis-Infused Oil
Ever thought about the awesome reasons to whip up your own cannabis-infused coconut and MCT oil? Here are some of my favorites:
- Make it Your Way: You get to decide how potent you want it! That way, it’s just right for you.
- Know Your Ingredients: When you make it yourself, you’re sure about what goes in. Only the good stuff, right?
- Save Some Bucks: Crafting your own infused oil is kinder to your wallet than always buying it off the shelf.
- So Many Ways to Enjoy: Take it as is, mix it in your food, or even use it on your skin. The choice is yours!
- It Lasts!: Coconut and MCT oil have a long shelf life, meaning you’ve got your special concoction ready when you fancy. You can also freeze for long-term use.
- Brain Boost: Some folks believe that combining cannabis, especially CBD, with MCT oil might support our brain health. Neat, huh?
- Glowing Skin: Imagine the soothing feel of this oil on your skin, plus the added magic of cannabis. Making creams and pain topicals is amazing.
- The Recipe Rockstar: Whether you’re baking or cooking, you can choose the perfect oil to infuse that blends in without an overpowering taste.
- Be Your Own Chef: There’s something empowering about making your own wellness potion!
- All the Goodness: By using the whole cannabis plant, you get every bit of its natural wonders, not just a part of it. This is called full-spectrum oil.
Understanding Cannabis Infusion
Cannabis infusion is the process of extracting the phytochemicals (plant chemicals) from the plant into a solvent such as oil.
Cannabinoids, terpenes, and flavonoids are the most common phytochemicals extracted from cannabis and hemp.
The plant material is steeped in a solvent over a period of time, much like tea leaves are steeped in water.
The plant material is removed and discarded, while the phytochemicals remain suspended in the liquid.
Both the process and the end result are called infusions.
“Extraction of medicinal plants is a process of separating active plant materials or secondary metabolites such as alkaloids, flavonoids, terpenes, saponins, steroids, and glycosides from inert or inactive material using an appropriate solvent and standard extraction procedure. “
In this guide, you’ll learn how to make cannabis-infused coconut oil or MCT oil, decarboxylate cannabis, or choose to infuse cannabis into any oil of your choice.
You don’t need to invest in any special devices to make cannabis-infused oils.
Herbalists have been infusing herbs and making medicinals for centuries. It’s not as hard as you think; as you expand your general knowledge, you’ll grow in confidence.
Time To Get Busy!
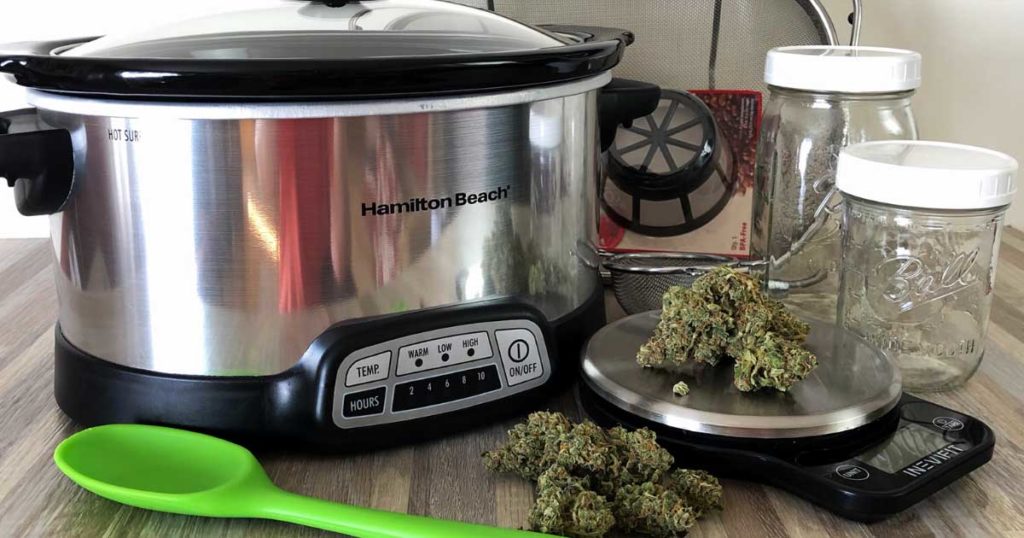
Equipment Needed to Make Cannabis Infused Oil
- Kitchen scale
- Crockpot (At a minimum, you need temperature settings such as Low and High settings. You may prefer a small crockpot for smaller batches.)
- Cooking thermometer
- Strainer – stainless steel mesh
- Reusable coffee basket filter ( Bubble hash micron filters may be used)
- Jelly roll baking sheet or Pyrex type baking dish with silicone lid
- Silicone baking mat, aluminum foil, or parchment baking paper (not wax paper!)
Grab Your Equipment Here
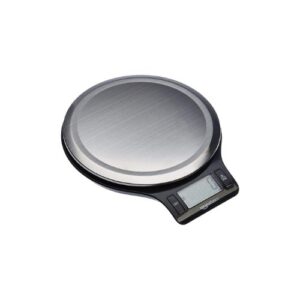 Kitchen ScaleKitchen Scale
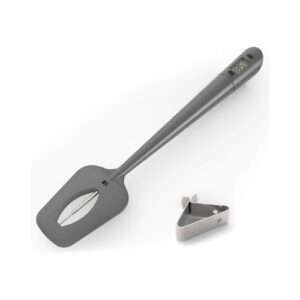 ThermometerThermometer
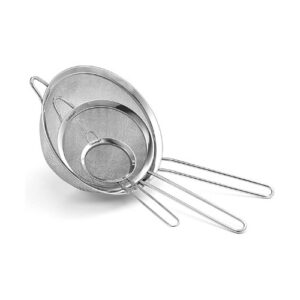 StrainerStrainer
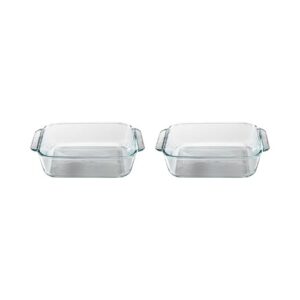 Pyrex Baking DishPyrex Baking Dish
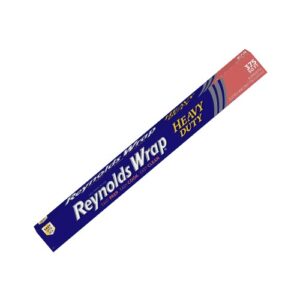 Aluminum FoilReynolds Foil
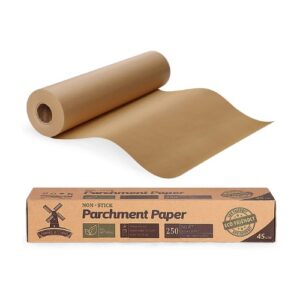 Parchment PaperParchment Paper
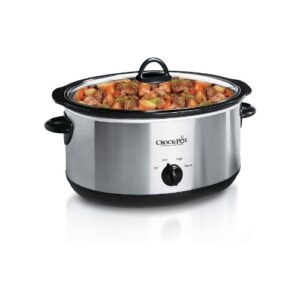 Crock-PotCrock-Pot
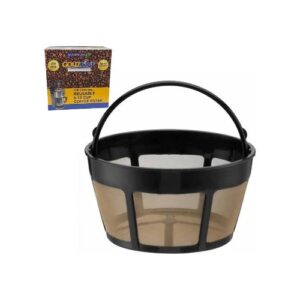 Coffee Basket FilterCoffee Basket Filter
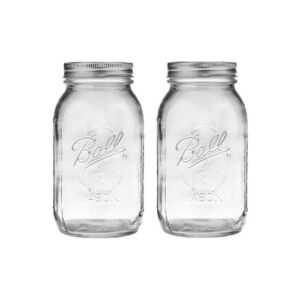 Ball Mason JarsBall Mason Jars
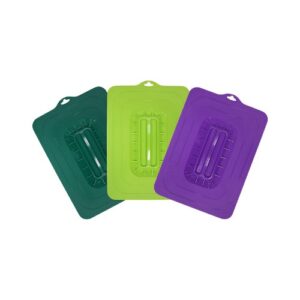 Silicone LidsSilicone Lids
Ingredients to make Infused Cannabis Oil:
Ingredients For Cannabis infused oil
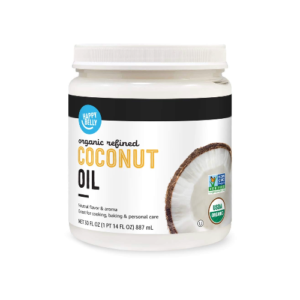 Refined Coconut OilRefined Coconut Oil
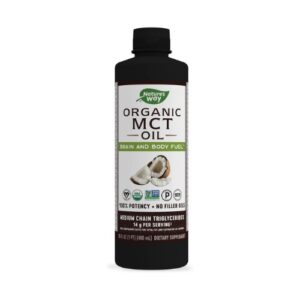 MCT OilMCT Oil
- Oil of your choice. The amount of oil will depend on the amount of cannabis or hemp material used. (See section on how to choose the best oil)
- Dried Cannabis or Hemp
How Much Cannabis and Oil should I use?
Consider using fan leaves, popcorn buds, and trim for large batches. Even stems can be used.
The glitter-like crystals seen on cannabis and hemp are called trichomes.
Trichomes contain many of the phytochemicals such as cannabinoids (THC, CBD, CBN, CBG), terpenes, and flavonoids that will be infused into the oil.
You will need approximately 4 ounces dry wt. of cannabis per 32 liquid ounces of oil. Adjust this for smaller batches. (2 oz dry plant per 16 oz oil).
The idea is to ensure your plant material is saturated and well-covered.
How to Decarboxylate Cannabis or Hemp
To convert the THC-A and CBD-A, for example, into their active forms — more commonly known as THC and CBD — you need to heat your plant material or flower.
I prefer not to use a grinder as that will cause the removal of many of your trichomes as they fall into the kief catcher.
Ideally, we want as many trichomes to stay on the buds as possible, as they contain all the cannabinoids, terpenoids, flavonoids, esters, and many other components of the Cannabis plant.
Steps to Decarboxylate Cannabis
- Preheat your oven to 240°F (115°C).
- Break down the cannabis buds into smaller pieces with your hands, a grinder, or scissors.
- Spread your bud or trim across a baking pan lined with aluminum foil, parchment paper, or in a glass Pyrex baking dish.
- Bake 45 minutes at 240ºF. About 45 minutes in a preheated oven at 240ºF-245° for THC conversion and 60 minutes for CBD conversion.
Tips:
- The more spread out the herb, the greater the surface area of the cannabis exposed to the heat.
- As a result of this process, the cannabinoids can now be active when orally consumed and passing through your gut, encountering first-pass metabolism by your liver.
- I recommend baking “low and slow” to guard against overheating and time exposure.
- Use an oven thermometer or laser thermometer to monitor your temperatures while the herb decarbs.
- You may gently shake the baking tray/dish or stir to maximize the exposed surface area of your cannabis. If possible, cover your tray or baking dish.
- Silicone oven-proof lids are now available, creating a good seal on glass baking dishes.
By covering the flower, you will contain the vapors released by the flower, allowing them to settle on the decarbed herb and reducing the smell in your kitchen. - Once removed from the oven, keep covered until it cools to room temperature to allow the vapors (which likely contain volatile cannabinoids, terpenoids, and other compounds) to fall back into your flower. Many people allow it to sit and cool for about 4 hours.
- Drier cannabis buds can spend less time in the oven, as they will need less time to decarb.
- Once out and cooled down, your cannabis can be infused into oils, butter, or any recipe.
- Placing your decarbed weed in the freezer for an hour will allow the trichomes to fall off more easily and optimize the upcoming infusion process.
Optional All-In-One Method of Decarboxylation and Oil Infusion
Once you are more comfortable with processing cannabis and understanding some science behind infusion, you may want to combine your process.
I process or infuse my oil for about 4 hours if my cannabis is already decarbed.
I eventually learned that I could “cook” low and slow for about 8 hours and achieve all the steps in one process.
I feel I lose less of the beneficial phytochemicals of the plant this way.
This method also reduces some of the smell if you keep a low profile. After 8 hours, I turn off my crockpot and let the oil and herb soak overnight.
People will waste time arguing over methods and decarboxylation. There are many ways to complete a job.
Choose a method that fits your lifestyle, that you believe in, and, most importantly, that works for you!
Steps to Make Cannabis-Infused Coconut Oil or MCT OIL
1. Melt oil in the baking dish or crockpot
2. Add decarboxylated cannabis to oil
3. If the oil doesn’t cover the material, you may add a bit more. (No need to float in oil, though).
If already decarbed, add water to the oil mixture to help cover the plant.
The water will boil at 212° F and help you monitor temps.
Do not let the mixture go over 250° F.
Water will help remove some of the chlorophyll and plant taste. Continuously monitor your temperatures.
4. Process decarboxylated cannabis/ hemp in the oil for about 4 hours OR process and decarb all in one step for 8 hours.
5. Cool product enough to work with. If using coconut oil, keep it in liquid form. Re-heat if needed.
Pour all contents into a very tightly woven metal mesh sieve strainer. This is your first straining.
6. Strain a second time through a small micron filter. A reusable coffee filter basket works great.
Repeat the straining with tighter woven filters until all the sediments are removed, and the oil is clear.
7. If you added water to your coconut oil while processing, put your strained oil in a shallow container in the refrigerator or freezer.
Once the coconut oil solidifies, the water is left behind.
A flexible plastic cool whip style or similar container may help when it comes time to “unmold” the solid oil. Dry the block of oil with a paper towel.
Warming oil and adding water is known as “water washing” and may be repeated to remove chlorophyll.
Cannabinoids stay within the oil, not the water.
8. Store your finished oil in the refrigerator or freezer until you’re ready to use it to protect and preserve the phytochemicals you worked so hard to capture.
9. Celebrate and look around at the mess you made! Just joking! Be proud of your hard work and your accomplishments. Well done!
Note about water washing:
If you’re making topical creams and salves, there is no reason to remove the natural chlorophyll of the plant material.
Some individuals feel chlorophyll upsets their stomachs when using this oil in food.
How to Infuse a Small Batch of Oil With Cannabis
Small Batch Equipment
- Canning Jar such as quart size or large enough for product and oil to fit
or
- Oven-proof baking dish (Pyrex) with a lid or oven-proof silicone cover to fit.
- Cooking Thermometer – digital or traditional candy thermometer or a digital laser.
- Strainer – metal wire mesh
- Reusable coffee basket filter ( Bubble hash micron filters may be purchased)
- Baking sheet or Pyrex-type baking dish
- Aluminum foil or parchment baking paper (not wax paper!)
Small Batch Ingredients
- 1/4 cup coconut oil or oil of your choice
- 1/8 oz dried cannabis flower
Steps to Make a Small Batch of Cannabis-Infused Coconut Oil
- Add melted oil to a canning jar
- Add decarboxylated cannabis and seal jar with lid
- Place in boiling water on the stovetop for at least one hour.
You can also use a crock pot filled with water to set the jar in for longer and slower processing. Don’t leave your stove unattended.
- Agitate jar or open and stir every 15 minutes
- Let the jar sit until cool or overnight. You may heat it again in a water bath if your oil turns to a solid.
- Strain the oil through a very tightly woven metal mesh sieve strainer. This is your first straining.
- Strain a second time through a small micron filter. A reusable coffee filter basket works great.
Repeat the straining if desired with tighter woven filters until all the sediments are removed and the oil is clear. - Store your finished oil in the refrigerator or freezer until you’re ready to use it to protect and preserve the phytochemicals you worked so hard to capture.
Did you make this recipe? We’d love to hear about your experience. Please share your comments and suggestions.
What is Coconut Oil?
Coconut oil comes from coconuts, found on tropical palm trees. It’s a solid fat but melts at 78°F. There are different ways to get this oil, and each method can change its quality and benefits.
What is MCT Oil?
MCT (Medium Chain Triglycerides) oil, sometimes known as fractionated coconut oil or liquid coconut oil, is a type of fat extracted mainly from coconuts. Through a process called fractionation, certain fats are separated, leaving a clear, odorless, and flavorless liquid. While MCT oil is versatile, it’s especially great for tinctures, smoothies, and cold dishes. However, avoid using it for high-heat cooking due to its low smoke point. It’s also popular in skincare and personal care products.
Can I Use Any Type of Coconut Oil for Cannabis Infusion?
Navigating the coconut oil aisle at your local store can feel like quite the adventure, with so many options to pick from!
From organic to virgin, refined to MCT, and everything in between, it’s a world of choices. And let’s not even start on the price tags!
Wondering which one pairs best with cannabis? Choose based on your cooking, dietary and or DIY needs.
Here’s a quick guide:
Organic Coconut Oil: Best for health-conscious users wanting to avoid potential chemicals like hexane. Especially recommended if choosing refined versions.
Virgin/Extra Virgin: Unrefined and carries a natural coconut aroma and flavor. Great for dishes where a coconut taste is desired.
Refined Coconut Oil: Neutral in flavor and aroma, making it versatile for various recipes. Its higher smoke point makes it suitable for frying and high-heat cooking.
Unrefined Coconut Oil: Offers a richer coconut flavor, ideal for tropical dishes and desserts.
Fractionated Coconut Oil/MCT: Best for cold dishes, salad dressings, and supplements. Not recommended for high-heat cooking due to its low smoke point.
For most cooking needs, refined coconut oil is a versatile choice. However, if you prefer a coconut flavor, opt for virgin or unrefined versions.
Do I Have to Use Coconut Oil to Make Cannabis-Infused Oil?
You do not have to stick to coconut oil or MCT oil to infuse. You may choose any healthy oil that would work well for your desired end product.
Good oil options include:
What Can I Use Cannabis-Infused Coconut Oil For?
- Baking
- Cooking
- Beverages
- Dietary supplement
- Capsules
- Suppositories
- Salves
- Creams
- Lotions
- Hair
- Personal lubricant
- Massage
And the list goes on….
How should I store Cannabis-Infused oil?
Store your cannabis-infused oil in the refrigerator or freezer until you can use it.
Heat and light will degrade your cannabis infusion. Choose dark-colored or amber-colored glass containers. Remember to label and date your oil.
Storing Coconut Oil
Coconut oil’s shelf life can differ based on its processing method. Typically, refined coconut oil lasts about two years, while virgin oil can extend to three or more. Always check and follow the expiration date on your product’s label for the best guidance.
How do I Determine the Potency of My Cannabis Oil?
Estimating the Potency of Your Canna Oil or Cannabutter
- Understanding Potency: Edibles can take 2-3 hours to show their full effect. It’s easy to eat too much thinking it hasn’t worked. To avoid this, try to know how potent each serving is.
- Calculating the THC: Start by converting the amount of cannabis you have from grams to milligrams: 5 grams = 5000 milligrams. If your cannabis is 20% THC, then: 5000mg x 20% = 1000mg THC.
- Estimating Infusion Rate: Not all THC from the cannabis will get into the oil. A realistic rate is between 50% and 80%. If we take the higher end: 1000mg x 80% = 800mg THC in your oil.
- Breaking Down the Dosage: If after making the oil you have 1 ¾ cups, and you’re using ¼ cup in a recipe that serves 12, you’d have about 9.5mg THC per serving.
How we got that:
- 1 ¾ cups is seven ¼ cups.
- Divide the 800mg THC by 7 = about 114mg per ¼ cup.
- If your recipe with ¼ cup serves 12, then 114mg ÷ 12 = 9.5mg THC per serving.
Remember, every person’s tolerance can be different. Always start with a small serving and wait a few hours before having more.
Cannabis Safety Disclaimers:
Dosing: Start low, go slow. Effects can be delayed with edibles.
Legal Age: For legal-age adults only. Follow local laws.
Impairment: Cannabis can impair driving and machinery operation.
Storage: Keep out of reach of children and pets. Clearly label cannabis products.
Medical Concerns: Consult a doctor if pregnant, nursing, or if you have medical conditions.
Potency Variability: Homemade cannabis items can have varied potencies. Consume with caution.
Allergies: Check ingredients for allergens. Beware of potential cross-contamination.
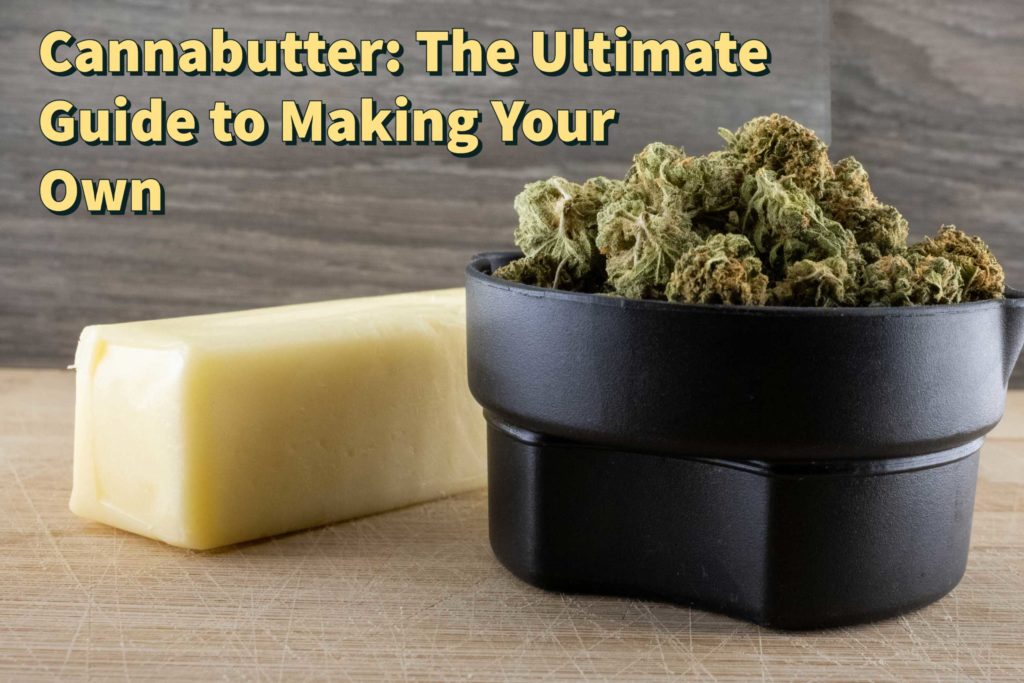
Need help with cannabutter? We’ve got you covered with a complete DIY guide from our recipe collection.
Learn More About Cannabis-Infused Oil in these Articles:
How to Make Cannabis-Infused Coconut Oil or MCT Oil: Crockpot Recipe
Infusing Cannabis Oil: 5 Tips You Need to Know Before You Begin
How to Make THC Gummy Bears with Canna Oil
Ganja, Cannabis, Marijuana, Pot and Weed Aprons Are Here!
Say hello to your new favorite cookware.
Great for baking, cooking, and spicing up your kitchen.
Click below to order your marijuana apron now!

How to Make Cannabis-Infused Coconut Oil or MCT Oil
Pop on that ganja apron, let’s embrace the delightful mess, and above all, let’s infuse some fun! This is my tried-and-true recipe for making cannabis-infused oil.
Keep the screen of your device on
Ingredients
32 oz Oil of your choice
4 oz Dry weight of Cannabis or Hemp
Directions
- You will need approximately 4 ounces dry weight of cannabis per 32 liquid ounces of oil. Adjust this for smaller batches. (2 oz dry plant per 16 oz oil).
- Melt oil in the baking dish or crockpot. Add decarboxylated cannabis to oil.
- If the oil doesn’t cover the material, you may add a bit more. (No need to float in oil, though). If already decarbed, add water to the oil mixture to help cover the plant. The water will boil at 212° F and help you monitor temps. Do not let the mixture go over 250° F. Water will help remove some of the chlorophyll and plant taste. Continuously monitor your temperatures.
- Process decarboxylated cannabis/ hemp in the oil for about 4 hours OR process and decarb all in one step for 8 hours.
- Cool product enough to work with. If using coconut oil, keep it in liquid form. Re-heat if needed. Pour all contents into a very tightly woven metal mesh sieve strainer. This is your first straining.
- Strain a second time through a small micron filter. A reusable coffee filter basket works great. Repeat the straining with tighter woven filters until all the sediments are removed, and the oil is clear.
- If you added water to your coconut oil while processing, put your strained oil in a shallow container in the refrigerator or freezer. Once the coconut oil solidifies, the water is left behind.
A flexible plastic cool whip style or similar container may help when it comes time to “unmold” the solid oil. Dry the block of oil with a paper towel.
Warming oil and adding water is known as “water washing” and may be repeated to remove chlorophyll. Cannabinoids stay within the oil, not the water.. - Store your finished oil in the refrigerator or freezer until you’re ready to use it to protect and preserve the phytochemicals you worked so hard to capture.
- Celebrate and look around at the mess you made! Just joking! Be proud of your hard work and your accomplishments. Well done!
- Instruction for a Small Batch of Infused Coconut Oil
- Add melted oil to a canning jar
- Add decarboxylated cannabis and seal jar with lid
- Place in boiling water on the stovetop for at least one hour. You can also use a crock pot filled with water to set the jar in for longer and slower processing. Don’t leave your stove unattended.
- Agitate jar or open and stir every 15 minutes
- Let the jar sit until cool or overnight. You may heat it again in a water bath if your oil turns to a solid.
- Strain the oil through a very tightly woven metal mesh sieve strainer. This is your first straining.
- Strain a second time through a small micron filter. A reusable coffee filter basket works great. Repeat the straining if desired with tighter woven filters until all the sediments are removed and the oil is clear.
- Store your finished oil in the refrigerator or freezer until you’re ready to use it to protect and preserve the phytochemicals you worked so hard to capture.
- How to Decarboxylate
- Preheat your oven to 240°F (115°C).
- Break down the cannabis buds into smaller pieces with your hands, a grinder, or scissors.
- Spread your bud or trim across a baking pan lined with aluminum foil, parchment paper, or in a glass Pyrex baking dish.
- Bake 45 minutes at 240ºF. About 45 minutes in a preheated oven at 240ºF-245° for THC conversion and 60 minutes for CBD conversion.
- Estimating Potency
- Understanding Potency: Edibles can take 2-3 hours to show their full effect. It’s easy to eat too much thinking it hasn’t worked. To avoid this, try to know how potent each serving is.
- Calculating the THC: Start by converting the amount of cannabis you have from grams to milligrams: 5 grams = 5000 milligrams. If your cannabis is 20% THC, then: 5000mg x 20% = 1000mg THC.
- Estimating Infusion Rate: Not all THC from the cannabis will get into the oil. A realistic rate is between 50% and 80%. If we take the higher end: 1000mg x 80% = 800mg THC in your oil.
- Breaking Down the Dosage: If after making the oil you have 1 ¾ cups, and you’re using ¼ cup in a recipe that serves 12, you’d have about 9.5mg THC per serving.
- How we got that:
1 ¾ cups is seven ¼ cups.
Divide the 800mg THC by 7 = about 114mg per ¼ cup.
If your recipe with ¼ cup serves 12, then 114mg ÷ 12 = 9.5mg THC per serving.
Recipe Video
Did you make this recipe?
Tag @the.cannabis.community on Instagram and hashtag it with #cannabiscommunityrecipes
Like this recipe?
Follow @tcannabiscommunity on Pinterest
Join our Facebook Group!
Follow https://www.thecannabiscommunity.org/cannabis-community/ on Facebook

Carol
July 9, 2023 at 12:04 pmI really wanted to know amounts of cannabis to amount of MCT oil. There are so many recipes it’s hard to decide which one is better. I’ve been making solventless gummies and I’ve been having difficulty getting them to be the right texture and consistency is definitely a learning curve. I’ve been using the powdered lecithin and about 1/2 the amount as the liquid. My gummies came out brownish red with the liquid lecithin so I switched to powdered, not granules. So last night I infused 1/2 oz of high grade trim, with lots of popcorn buds. I don’t have a slow cooker so I stir a lot.I need a little advice. Thank you
Penelope Hamilton Crescibene
July 28, 2023 at 11:27 amExperimenting the way you did is an excellent way to learn and tweak a reipe to your individual liking. Honestly, there is no one right answer to tell you for an exact measuremt of herb to oil. The key is to make sure you put enough oil to cover the herb. The size of your buds and if you grind it up or not determines how much oil is neede to cover the plant material. The more oil, the more diluted your strength will be. Even The Magical Butter Machine recipe won’t give an exact amount. Their recipe reads; 1/4-1/2 ounce or 7-14 grams herb foe every 1 cup of oil. They suggest a minumun of 2 cups of oil. I hope this makes sense.
Olivia Rosengren
September 25, 2023 at 9:19 amHello! So I followed this step by step and in the decarboxylating step I’ve found that after taking it out of the oven it’s still not fully dried out. Is that normal or is there something I could be doing wrong? I have been using a dutch oven until my oven safe silicone containers come in the mail. Any tips?
Penelope Hamilton Crescibene
October 11, 2023 at 10:23 amHi Olivia,
Did you used dry, cured cannabis? If not, you should really let it dry and cure naturally first. But, assuming that you did use dried herb, just go ahead and finish the infusing processas as long as it inolves heat. The oil or butter infusion will finish decarbing any acids left behind.
Dee
February 12, 2024 at 7:36 pmI followed the crock pot recipe, filtered through cheese cloth then coffee filters then cheese cloth and still turned out to be a very dark oil. I used mct coconut oil. Not sure what went wrong.